
Mini Cushion Make-up Instructions
Once you have completed your stitched design, you can either frame your project or make up into a mini cushion.
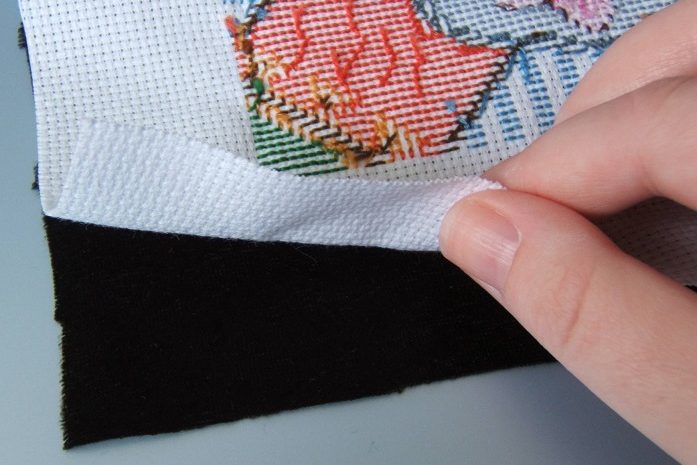
1. Place the backing fabric right side up on a flat surface. Then lay your stitched fabric on top of the backing fabric, right side down.
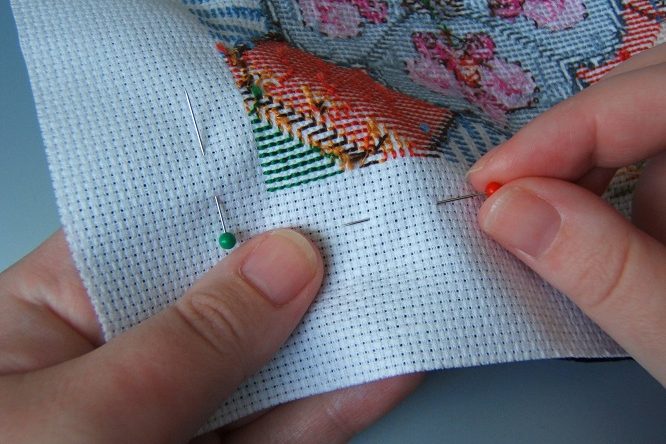
2. Pin the two pieces together around the outside edges of the design.
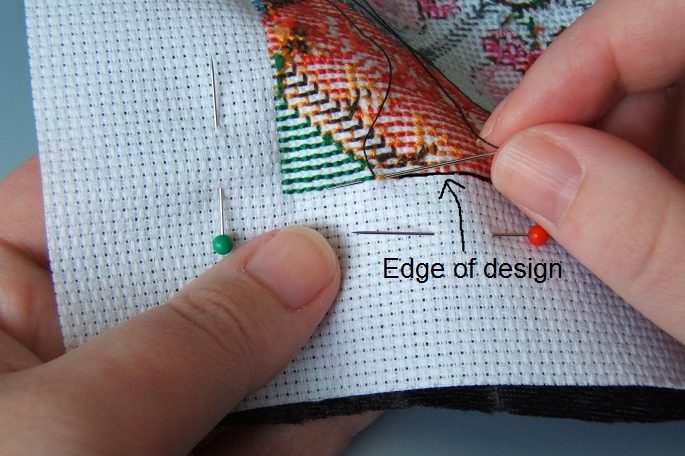
3. Using strong sewing thread, backstitch the two pieces together around all four sides, following the edge of the cross stitching, leaving a gap of 2" (5cm) along the middle of the bottom edge (for turning inside out). Then remove all pins.
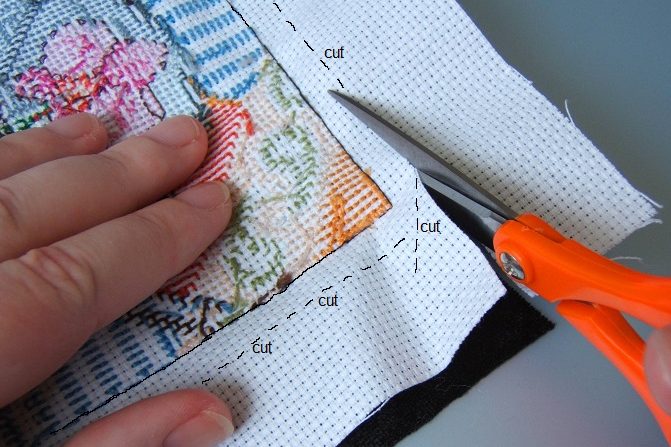
4. Trim all 4 edges of both pieces of fabric about 4 rows away from the stitched seam. Then cut across all 4 corners, taking care not to cut too closely to the stitching, to reduce bulk when turning the mini cushion inside out.
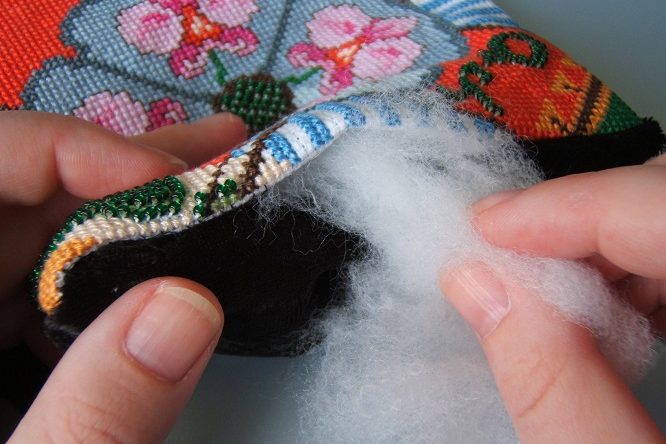
5. Carefully turn the mini cushion inside out, pushing the blunt end of a pencil into each corner to help turn them out fully and create sharper corners. Push soft polyester toy filling into the mini cushion, being sure to fill the corners firmly, but as the mini cushion is small, do not overfill it as you may spoil the finished effect.
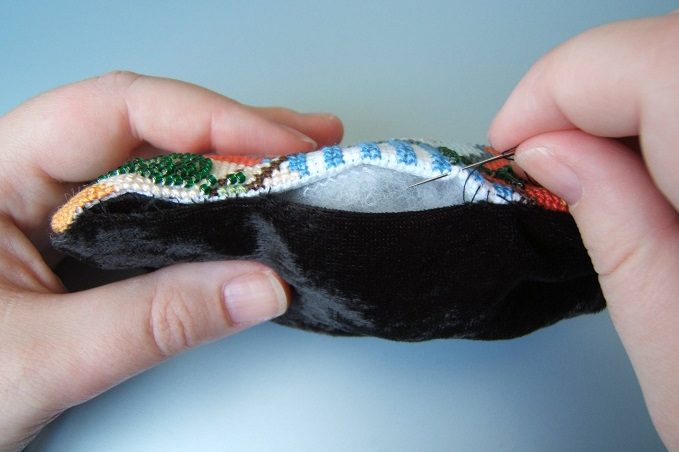
6. With strong sewing thread, close up the gap by either over-sewing or using Ladder stitch.

We need your consent to load the translations
We use a third-party service to translate the website content that may collect data about your activity. Please review the details in the privacy policy and accept the service to view the translations.